Creating a sewing pattern for a bucket hat requires some measurements and basic pattern-making skills. Here's a step-by-step guide to making a simple bucket hat pattern:
Materials:
- Measuring tape
- Paper for the pattern
- Pencil
- Ruler
- Compass or a circular object (for rounding the brim)
- Fabric of your choice
- Sewing machine or needle and thread
- Elastic cord (optional)
- Safety pin (optional)
Instructions:
1. Measure Your Head:
- Measure the circumference of your head where you want the hat to sit (usually just above the ears). Add an extra inch or two for comfort and seam allowance.
2. Create the Crown Pattern:
- Draw a rectangle on your pattern paper. The width of the rectangle should be half of your head circumference + 1 inch for seam allowance. The height of the rectangle will be the height of your crown (the distance from the top of your head to where you want the crown to end) + 1 inch for seam allowance.
- Fold the rectangle in half lengthwise, so you have a shorter but wider rectangle.
- At the folded edge, draw a gentle curve for the top of the hat. This curve will determine the size of the crown. The wider the curve, the deeper the crown will be.
- Cut out the folded rectangle along the curved line, and when you unfold it, you should have a circular crown pattern.
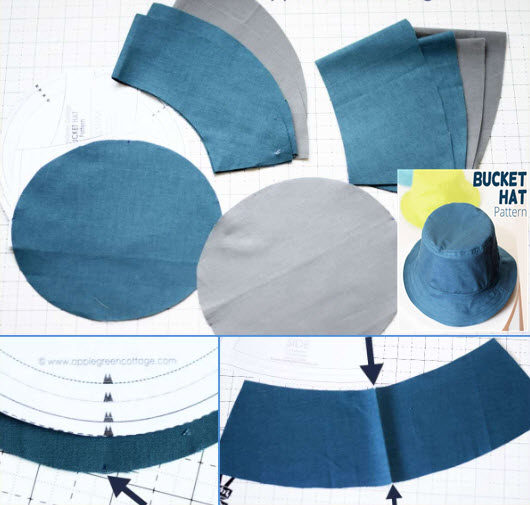
3. Create the Brim Pattern:
- Measure how long you want your brim to be from the edge of the crown (usually 2 to 3 inches) and mark it on the pattern paper.
- Use a compass or a circular object to draw a circle around the marked point. The size of the circle will determine the size of the brim. A larger circle will result in a wider brim.
- Cut out the circle to create your brim pattern.
4. Cut the Fabric:
- Lay your fabric flat and pin the crown and brim patterns to the fabric.
- Cut two crown pieces and one brim piece from your fabric. You can cut additional brim pieces if you want a double-layered brim.
5. Sew the Hat:
- Sew the crown pieces right sides together, leaving the bottom edge open. This forms the top part of the hat.
- Sew the brim piece(s) right sides together along the curved edge.
6. Attach the Brim:
- Pin the brim to the bottom edge of the crown, right sides together. Make sure to evenly distribute the fabric to avoid puckering.
- Sew the brim to the crown, leaving a small opening for turning.
7. Finish the Hat:
- Turn the hat right side out through the opening.
- If you want to add an optional elastic cord, thread it through the bottom edge of the crown and adjust it to your desired fit. Secure the ends together and close the opening.
8. Hem the Brim (if needed):
- Fold the brim up to your desired height and hem it in place using a straight stitch or a decorative stitch.
9. Press and Wear:
- Give your hat a final press with an iron to smooth out any wrinkles.
Your bucket hat is now ready to wear! Customize it with your choice of fabric and any embellishments you like. Be creative and have fun with your sewing project!


