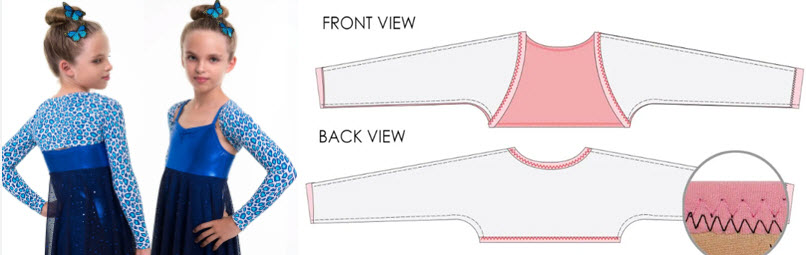
Creating a sewing pattern for a shrug involves a few basic steps. Here's a simple guide for sewing a basic shrug pattern:
Materials You'll Need:
- Fabric of your choice (about 1-1.5 yards, depending on your size and the length you desire)
- Sewing machine
- Matching thread
- Scissors
- Pins
- Measuring tape
- Paper and pencil for creating the pattern
Steps:
- Measurements:
- Measure around your shoulders and add a few inches for ease of movement.
- Measure the length from your shoulder to where you want the shrug to end.
- Create the Pattern:
- Take a large piece of paper, fold it in half lengthwise.
- On the folded edge, mark half of your shoulder measurement.
- From the fold, measure down the length you want the shrug and mark it.
- Connect these two points with a curved line to form the back panel of the shrug.
- Now, create two rectangles for the sleeves. The width of these rectangles should be half of your upper arm circumference plus some ease for movement. The length can be as long as you want your sleeves to be.
- Cut out the back panel and two sleeve rectangles.
- Cutting the Fabric:
- Lay your fabric flat, fold it in half if needed, and pin your pattern pieces onto the fabric.
- Cut around the pattern pieces, leaving a ½ inch seam allowance.
- Sewing the Sleeves:
- Fold each sleeve rectangle in half lengthwise, right sides together.
- Sew along the long edge, creating a tube.
- Turn the sleeves right side out.
- Assembling the Shrug:
- Lay the back panel flat, right side up.
- Place one sleeve tube on each side of the back panel, aligning the raw edges of the sleeves with the straight edge of the back panel.
- Pin the sleeves in place.
- Sew along the pinned edges, attaching the sleeves to the back panel.
- Finishing:
- Fold the shrug in half lengthwise, right sides together.
- Sew along the side edges, starting from the cuff of the sleeve down to the bottom edge.
- Turn the shrug right side out.
- Hemming:
- Hem the cuffs of the sleeves and the bottom edge of the shrug by folding the fabric over twice and sewing in place.
- Final Touches:
- Give your shrug a good press with an iron to make it neat and crisp.
- Try it on to ensure it fits well.
That's it! You've created a basic shrug sewing pattern. You can customize this pattern by adding embellishments, changing the sleeve style, or choosing different fabrics to suit your style and preferences.


