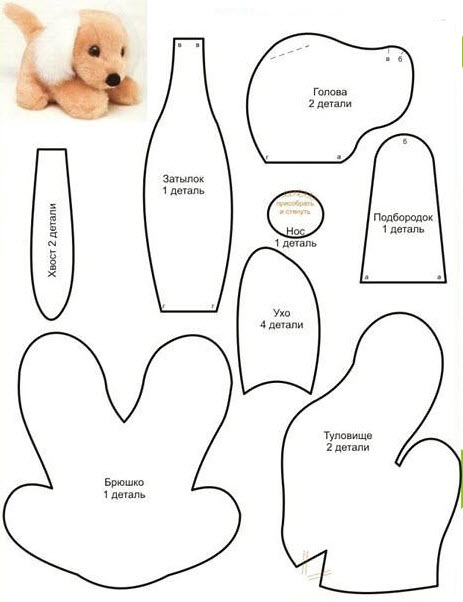
Creating a stuffed dog can be a fun sewing project, and there are various patterns available depending on the style and size you want. Below, I'll provide you with a basic outline for a simple stuffed dog sewing pattern. You can customize it by choosing different fabrics, colors, and adding unique details.
Materials:
- Fabric for the body (e.g., fleece, cotton, minky)
- Fabric for the ears and tail
- Safety eyes or buttons for the eyes (optional)
- Fiberfill stuffing
- Sewing machine and thread
- Scissors
- Pins
- Hand-sewing needle
Instructions:
- Select a Pattern: You can find various stuffed dog patterns online or create your own by sketching the desired dog shape on paper. Make sure to include seam allowances (usually about 1/4 inch or 0.64 cm) around the pattern pieces.
- Cut Out the Pieces: Trace and cut out the pattern pieces from your chosen fabrics. You'll need two identical pieces for the body and two for the ears, as well as a smaller piece for the tail.
- Sew the Ears and Tail:
- Take two ear pieces, place them right sides together, and sew along the curved edge, leaving the bottom open.
- Turn the ears right side out and set them aside.
- Repeat the same process for the tail, sewing it right sides together along the curved edge and turning it right side out.
- Attach Ears and Tail:
- Position the ears on one of the body pieces and pin them in place, with the raw edges of the ears aligned with the raw edge of the body piece.
- Place the tail in the center of the same body piece, with the raw edge aligned with the bottom edge.
- Sew the ears and tail in place with a straight stitch.
- Add the Eyes (Optional): If you're using safety eyes, attach them to the dog's face according to the manufacturer's instructions. If you prefer, you can embroider the eyes using black thread.
- Assemble the Dog:
- Place the two body pieces right sides together, ensuring the ears and tail are sandwiched between them.
- Pin around the edges, leaving an opening (usually at the belly) for turning and stuffing.
- Sew the Body:
- Sew around the edges of the dog, leaving the opening unsewn. Use a 1/4 inch (0.64 cm) seam allowance.
- Clip curves and corners to help the dog's shape turn out nicely.
- Turn and Stuff:
- Turn the stuffed dog right side out through the opening.
- Begin stuffing the dog with fiberfill, starting with the legs and ears, and then filling the body. Adjust the stuffing to achieve your desired level of firmness.
- Close the Opening:
- Hand-sew the opening closed using a ladder stitch or slip stitch.
- Finish and Customize: You can add details like a nose, mouth, or collar using embroidery thread or fabric paint.
- Give Your Stuffed Dog a Name: Your new stuffed dog is ready for cuddles and play!
Feel free to adapt this basic pattern to create different dog breeds and personalities by altering the shape, size, and colors. You can also add fabric scraps for features like ears and a tongue. The possibilities for customization are endless!


