Creating a sewing pattern for scrub caps is relatively simple and can be a fun DIY project. Scrub caps are commonly worn by medical professionals and are designed to cover the hair to maintain a sterile environment. Here's a basic sewing pattern for a standard scrub cap:
Materials Needed:
- Cotton fabric (about 1/2 yard)
- Matching thread
- Sewing machine
- Scissors
- Pins
- Elastic (1/4-inch width, about 16 inches)
- Paper for the pattern template
- Measuring tape or ruler
Instructions:
1. Create a Pattern Template:
Start by creating a pattern template for your scrub cap. You can draw this directly onto your fabric, but it's often easier to use paper for your first attempt.
Here are the basic measurements for the template:
- Main Body: A rectangle measuring about 24 inches by 12 inches. This will be the main part of the scrub cap.
- Ties: Two rectangles measuring about 18 inches by 3 inches each. These will be used to create the ties that secure the cap.
- Elastic Casing: A strip measuring about 22 inches by 1.5 inches. This will be folded in half to create a casing for the elastic band.
2. Cut the Fabric:
Once you have your pattern template, use it to cut the corresponding pieces from your cotton fabric. Make sure to cut two main body pieces, two tie pieces, and one elastic casing piece.
3. Sew the Ties:
Fold each tie piece in half lengthwise, right sides together. Sew along the long edge and one short edge, leaving one short edge open. Turn the ties right side out and press them flat.
4. Create the Elastic Casing:
Fold the elastic casing strip in half lengthwise, wrong sides together, and press it flat. Open it up and fold the raw edges toward the center fold, then fold it in half again so the raw edges are enclosed. Stitch along the folded edge to create the casing.
5. Assemble the Scrub Cap:
- Place the two main body pieces right sides together and sew along the curved top edge with a 1/4-inch seam allowance. This is the part that will fit over the head.
- Open up the main body piece and press the seam open.
- Pin the ties to the sides of the main body piece, about 3 inches from each edge. Make sure the raw edges are aligned. Sew them in place.
- Fold the main body piece in half, right sides together, with the ties on the inside. Pin the top and back edges together and sew with a 1/4-inch seam allowance, leaving the bottom edge open.
- Turn the scrub cap right side out and press it flat.
- Insert the elastic into the casing using a safety pin to guide it through. Overlap the ends of the elastic by about 1/2 inch and sew them together securely.
6. Finish the Scrub Cap:
Fold the raw edge at the bottom of the scrub cap inside by about 1/4 inch and sew it in place to create a clean hem.
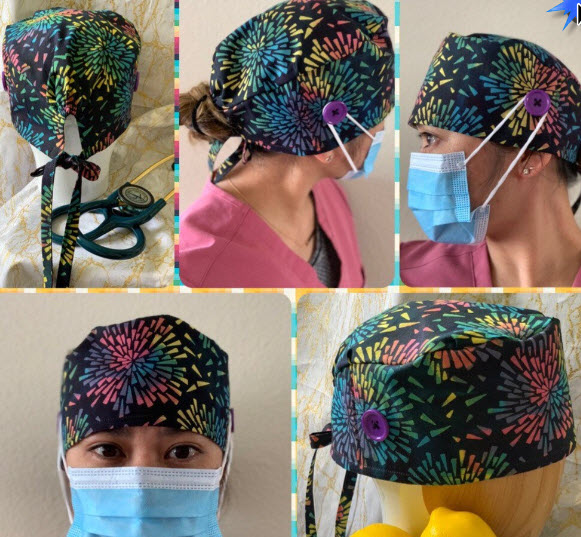
Your scrub cap is now complete and ready to be worn. You can personalize it with different fabrics or add a button on each side to hold a face mask in place. Adjust the measurements as needed to fit your head comfortably.


