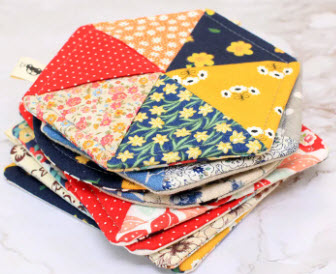
Creating fabric coasters is a simple and enjoyable sewing project. Here's a basic pattern for making square fabric coasters:
Materials:
- Fabric scraps (cotton or linen works well)
- Batting or felt for the inner layer
- Sewing machine or needle and thread
- Fabric marker or pencil
- Iron
Instructions:
Step 1: Cut Fabric and Batting Pieces
- Main Fabric (2 pieces per coaster):
- Cut two squares of fabric. A common size is 4 inches by 4 inches (10 cm by 10 cm). Adjust the size based on your preference.
- Batting or Felt (1 piece per coaster):
- Cut a square of batting or felt slightly smaller than the fabric squares. For a 4x4 inch coaster, cut the inner layer to around 3.5x3.5 inches (9 cm by 9 cm).
Step 2: Layer the Materials
- Place one fabric square right side up on your work surface.
- Center the batting or felt square on top of the fabric.
- Put the second fabric square right side down on top of the batting/felt, creating a fabric sandwich with the batting in the middle.
Step 3: Pin and Sew
- Pin the layers together to secure them.
- Using a 1/4 inch (0.6 cm) seam allowance, sew around the edges, leaving a small opening (about 2 inches or 5 cm) on one side for turning.
Step 4: Clip Corners and Turn Inside Out
- Clip the corners diagonally to reduce bulk.
- Turn the coaster inside out through the opening.
Step 5: Press and Topstitch
- Press the coaster flat with an iron to create crisp edges.
- Topstitch around the entire coaster, close to the edge. This will close the opening and give a finished look.
Step 6: Optional Quilting (if desired)
- You can add decorative quilting lines across the coaster for added texture. Simply sew straight lines or a pattern through all layers.
Step 7: Enjoy Your Coasters
Repeat these steps to make as many coasters as you'd like. Feel free to experiment with different fabrics and patterns to create a set of unique and personalized coasters for your home or as gifts.


