Creating a poncho is a fun and relatively simple sewing project, whether you're a beginner or an experienced sewer. Below, I'll outline two basic poncho patterns: one for a traditional square poncho and another for a more fitted, asymmetrical poncho. These patterns are customizable to fit various sizes and styles.
Contents
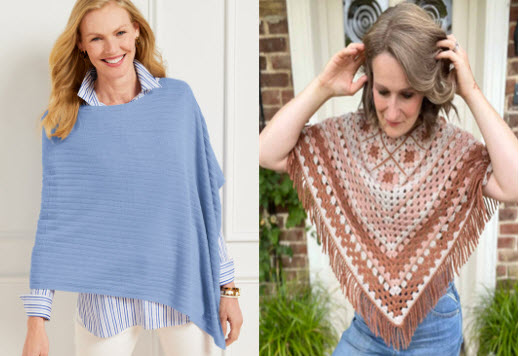
Traditional Square Poncho:
Materials Needed:
- 2 yards of fabric (fleece, wool, cotton, or any fabric of your choice)
- Sewing machine
- Thread
- Scissors
- Pins
- Measuring tape
Instructions:
- Measure and Cut Fabric:
- Fold your fabric in half widthwise.
- Measure and mark a 30-inch square from the folded corner.
- Cut along the lines so you have two equal square pieces of fabric.
- Sew Shoulder Seams:
- Place the two fabric pieces together with right sides facing each other.
- Pin along the top edge (shoulder) of the poncho.
- Sew a straight stitch along the pinned edge, leaving a ½ inch seam allowance.
- Finish the seam with a serger or zigzag stitch to prevent fraying.
- Finish Edges:
- Fold and press the side and bottom edges of the poncho ½ inch towards the wrong side of the fabric.
- Sew a straight stitch along the folded edges to secure them.
- Optional Embellishments:
- Add fringe, tassels, or decorative stitching along the edges for a personalized touch.
- Try it on and Enjoy!
- Your traditional square poncho is now ready to wear.
Fitted Asymmetrical Poncho:
Materials Needed:
- 2 yards of fabric (knit or lightweight woven fabric works well)
- Sewing machine
- Thread
- Scissors
- Pins
- Measuring tape
Instructions:
- Create Pattern:
- Take your measurements:
- Bust circumference (around the fullest part of your bust)
- Shoulder width (from the base of your neck to the edge of your shoulder)
- Length from shoulder to desired hemline
- Cut a rectangle with a width equal to ½ of your bust circumference plus 4 inches, and a length equal to your desired poncho length.
- Take your measurements:
- Cut Fabric:
- Fold your fabric in half lengthwise.
- Use your pattern to cut one piece of fabric.
- Sew Shoulder Seams:
- With right sides together, pin and sew the shoulder seams using a ½ inch seam allowance.
- Create Neckline:
- Fold the neckline edge over ½ inch towards the wrong side of the fabric and press.
- Fold again ½ inch and press.
- Sew along the folded edge to secure, leaving a small opening for the neck.
- Finish Edges:
- Fold and press the side and bottom edges of the poncho ½ inch towards the wrong side of the fabric.
- Sew a straight stitch along the folded edges to secure them.
- Optional Embellishments:
- Add trim, pockets, or decorative stitching as desired.
- Try it on and Enjoy!
- Your fitted asymmetrical poncho is now ready to wear.
Feel free to adjust these patterns to your liking by adding pockets, hoods, or varying the lengths and shapes. Happy sewing!


