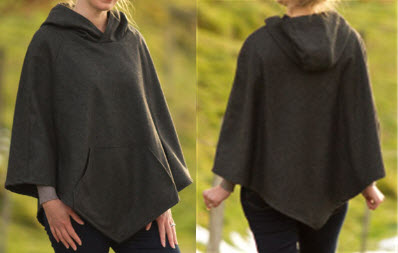
Creating a hooded cape sewing pattern allows for a stylish and functional garment. Here's a simple pattern for a hooded cape:
Materials Needed:
- Fabric of your choice (wool, fleece, or a heavy woven fabric works well)
- Lining fabric (optional)
- Sewing machine or needle and thread
- Scissors
- Measuring tape
- Pins
- Hood pattern (you can find free patterns online or create your own by tracing around a hooded garment)
Instructions:
- Measurements:
- Determine the desired length of your cape. A common length is around knee-length, but you can adjust this according to your preference.
- Measure from the base of your neck (where the cape will sit) to the desired length.
- Cutting the Fabric:
- Cut out two rectangles of fabric for the cape body. Each rectangle should be the length you measured in step 1 plus an additional 2 inches for seam allowance, and the width should be half the desired width of the cape plus an additional 2 inches for seam allowance.
- Cut out two hood pieces using your hood pattern. Make sure to cut one piece with the fabric folded so that you have a front and back piece for the hood.
- Optionally, cut out two rectangles of lining fabric using the same dimensions as the cape body if you want to line your cape.
- Sewing the Hood:
- Place the two hood pieces with right sides together and sew along the curved edge, leaving the bottom edge open.
- Trim the seam allowance and clip the curved edge to help it lay flat.
- Turn the hood right side out and press it flat with an iron.
- Attaching the Hood:
- Lay one cape body piece flat with the right side facing up.
- Position the hood along the top edge of the cape body piece, aligning the raw edges.
- Pin the hood in place along the curved edge of the cape body.
- Sew the hood to the cape body with a straight stitch.
- Assembling the Cape:
- Place the second cape body piece on top of the first with the right sides together, sandwiching the hood in between.
- Pin the sides and top edge of the cape together.
- Sew along the sides and top edge of the cape with a straight stitch, leaving the bottom edge open.
- Finishing Touches:
- Trim any excess fabric and threads.
- Optionally, if you are lining your cape, repeat steps 5 and 6 with the lining fabric.
- Turn the cape right side out and press the seams with an iron.
- Optionally, add closures such as buttons or toggles to the front of the cape for a secure fit.
Your hooded cape is now complete and ready to keep you warm and stylish. Feel free to customize it further by adding decorative elements such as trim or embroidery.


