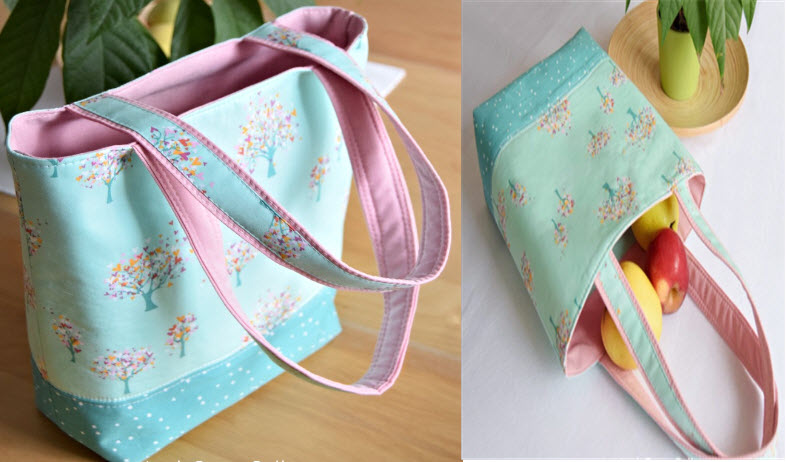
I understand that you'd like me to provide you with a step-by-step guide to make a tote bag. Below is a simple tote bag pattern for you to sew:
Materials You'll Need:
- Fabric of your choice (cotton, canvas, or any durable material)
- Matching thread
- Sewing machine or needle if you prefer hand sewing
- Scissors
- Pins
- Ruler or measuring tape
- Iron and ironing board
- Optional: Interfacing for added stability
Instructions:
- Prepare Your Fabric:
- Wash and iron your fabric to prevent any shrinking or distortion after sewing.
- Measure and Cut Your Fabric:
- Decide on the size of your tote bag. A common size is around 14 inches wide, 16 inches tall, and 4 inches deep, but you can adjust these measurements to your liking.
- Cut two identical pieces of fabric for the main body of the tote. These will be the front and back panels of your bag.
- Cut two additional strips for the handles. These should be the desired length for your handles, typically around 24 inches long, and 4 inches wide. You can adjust the length based on how long you want the handles to be.
- Optional: Use Interfacing (for added stability):
- Iron interfacing onto the wrong side of the fabric pieces that will become the main body of the bag. This will provide added stability and structure to your tote.
- Sew the Handles:
- Fold each handle strip in half lengthwise, right sides together.
- Sew along the long edge, leaving the short ends open.
- Turn the handles right side out, press them flat, and set them aside.
- Sew the Main Body:
- Place the two main body pieces right sides together.
- Sew the side seams and bottom seam, leaving the top edge open. Use a 1/2-inch seam allowance.
- Create Box Corners (to add depth to the bag):
- At each bottom corner of the bag, open it to form a triangle by aligning the side seam with the bottom seam. This will create a "corner" for the bag.
- Measure and mark a line about 2 inches from the corner tip.
- Sew along this marked line, creating a diagonal seam. Repeat for the other bottom corner.
- Attach the Handles:
- Pin the handles to the top edge of the bag, making sure they are evenly spaced and the raw edges of the handles align with the raw edge of the bag.
- Stitch the handles in place with a square or "X" pattern for added strength.
- Finish the Edges (optional):
- If you want a neater finish, fold the top edge of the bag over by about 1/2 inch and press it.
- Sew a topstitch along the folded edge to secure it.
- Final Touches:
- Trim any loose threads and give your tote bag a final press with an iron.
And there you have it! You've created a simple tote bag. Feel free to customize your tote by using different fabrics, adding pockets, or embellishments.


