Creating a surgical cap sewing pattern can be a useful project, especially given the current need for personal protective equipment (PPE). Here's a basic guide to help you make a simple surgical cap pattern:
Materials and Tools:
- Fabric (cotton or a cotton blend is recommended)
- Sewing machine
- Scissors
- Measuring tape
- Pins
- Thread
Instructions:
- Measure and Prepare:
- Measure the head circumference of the person who will wear the surgical cap. Typically, this measurement is around 22-24 inches (56-61 cm) for adults.
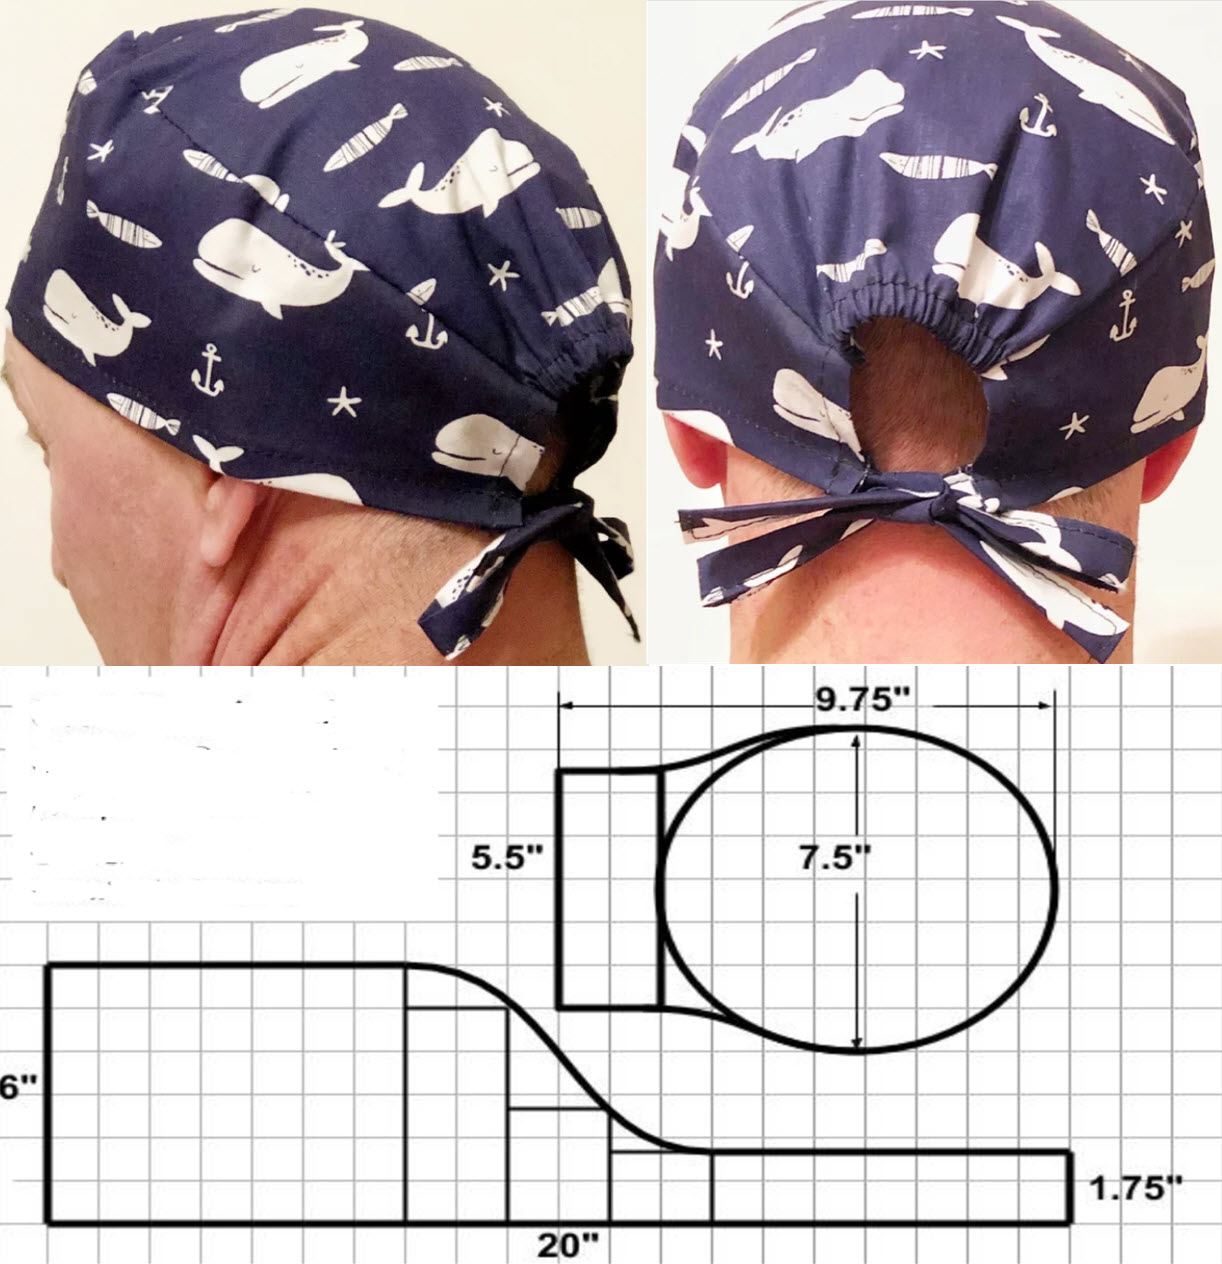
- Create a Pattern:
- Decide on the depth you want for the cap. A typical surgical cap depth is around 6-7 inches (15-18 cm).
- Create a rectangular pattern with the following dimensions:
- Width (horizontal): Half of the head circumference + 2 inches for seam allowance
- Length (vertical): Desired depth of the cap + 1 inch for seam allowance
- For example, if the head circumference is 24 inches, the width of the pattern would be 13 inches (12 inches for half the head circumference + 1 inch for seam allowance). If the desired depth is 6 inches, the length would be 7 inches (6 inches for depth + 1 inch for seam allowance).
- Cut the Fabric:
- Fold your fabric in half with the right sides facing each other.
- Pin the pattern to the fabric and cut out two identical pieces.
- Sewing:
- With the right sides facing each other, sew the top (short) edges of the fabric together, leaving a 1/2-inch seam allowance.
- Then, sew the back (long) edges together, again with a 1/2-inch seam allowance.
- Create the Elastic Casing:
- Fold the bottom (long) edge up about 1 inch to create a casing for the elastic band. Pin it in place.
- Sew the Casing:
- Stitch along the folded edge, leaving a small gap to insert the elastic band.
- Insert Elastic Band:
- Cut a piece of elastic band to the length you measured earlier (the head circumference). Attach a safety pin to one end of the elastic band to help thread it through the casing.
- Insert the elastic band through the gap in the casing and secure the two ends of the elastic together.
- Close the Casing:
- Sew the gap in the casing closed, making sure the elastic is secured in place.
- Final Touches:
- Turn the cap right-side out and press it to create a neat finish.
- Your surgical cap is now ready to use.
Please note that while this homemade surgical cap can be useful for personal use, it may not meet the specific requirements and standards of medical-grade PPE. If you plan to donate these caps or use them in a healthcare setting, check with the intended recipients for any additional guidelines or specifications they may have.


