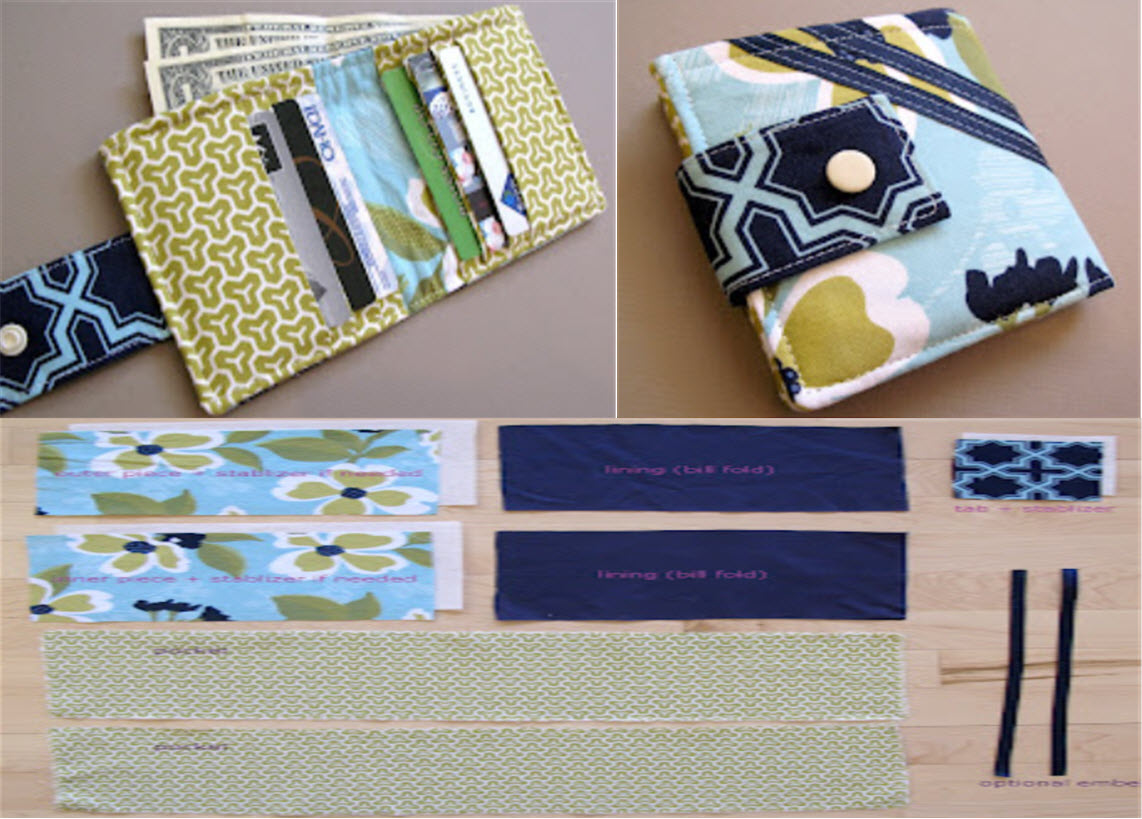
Creating a sewing pattern for a wallet is a straightforward project, and you can customize it to your preferences. Here's a basic template for a simple bi-fold wallet. You can adjust the measurements and style to suit your needs:
Materials:
- Fabric of your choice (e.g., cotton, denim, leather)
- Lining fabric (optional)
- Interfacing (for added structure, optional)
- Thread
- Scissors
- Sewing machine or needle
- Pins
- Snap or button for closure (optional)
- Iron and ironing board
Instructions:
- Measurements: Decide on the size of your wallet. For a standard-sized wallet, you can start with a rectangle that measures 8.5 inches in width and 4 inches in height. Add seam allowances of 1/4 inch to each side for a total of 9 inches by 4.5 inches.
- Cut Your Materials:
- Cut two pieces from your main fabric using the measurements above.
- Cut two pieces from your lining fabric using the same measurements.
- Optionally, cut pieces of interfacing that are slightly smaller than the fabric pieces (for added structure).
- Iron-On Interfacing (optional):
- If you're using interfacing, iron it onto the wrong side of your main fabric pieces following the manufacturer's instructions. This adds structure to your wallet.
- Attach the Lining:
- Place one lining piece right sides together with one main fabric piece.
- Sew along the two longer sides, leaving one shorter side open. Use a 1/4 inch seam allowance.
- Trim the corners to reduce bulk, then turn the piece right side out.
- Press it with an iron to get crisp edges.
- Repeat with the other lining and main fabric pieces.
- Fold the Wallet:
- Place the two pieces you just created with the lining sides facing each other.
- Fold the wallet in half to create the bi-fold shape.
- Pin the sides together.
- Sew the Wallet Edges:
- Sew along the two shorter sides, keeping a 1/4 inch seam allowance.
- Leave the top open.
- Trim and Turn:
- Trim any excess fabric and trim the corners to reduce bulk.
- Carefully turn the wallet right side out.
- Finishing:
- Press the wallet to make it flat and neat.
- If you want to add a closure, sew a snap or button onto the front and back of the wallet.
- Optional Pockets:
- If you want to add card slots or pockets inside the wallet, cut smaller rectangles from fabric, fold them in half, and sew them onto the lining before sewing the lining pieces together.
- Final Touches:
- Press your wallet again to ensure everything is neat and flat.
- Trim any loose threads.
This basic pattern creates a simple bi-fold wallet. You can get creative by adding more pockets, using different fabrics, or adding embellishments. Remember to adjust the measurements as needed for your specific design and desired size.


