
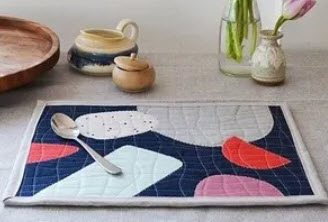
Certainly! Here’s a simple pattern for sewing placemats:
Materials:
- Fabric for the front of the placemat
- Coordinating fabric for the back of the placemat
- Batting (for added thickness, optional)
- Matching thread
- Sewing machine
- Scissors
- Iron
Instructions:
1. Measure and Cut:
- Decide on the size of your placemats. A standard size is around 12 inches by 18 inches, but you can adjust based on your preference.
- Cut the front fabric, back fabric, and batting to the desired size. If you’re using batting, cut it the same size as the fabric pieces.
2. Layer the Materials:
- If using batting, place it between the front and back fabric pieces.
- Align all three layers (front fabric right side up, batting, back fabric right side down).
3. Pin and Sew:
- Pin around the edges to secure the layers together.
- Sew around the edges with a 1/4 inch seam allowance, leaving a small opening (about 3 inches) on one side.
4. Trim Corners:
- Trim the excess fabric from the corners to reduce bulk.
5. Turn Inside Out:
- Reach through the opening and turn the placemat inside out. Use a pointed object (like a chopstick or the blunt end of a pencil) to push out the corners for a crisp finish.
6. Press:
- Iron the placemat to smooth out any wrinkles and create a neat edge. Pay special attention to the edges and the opening.
7. Topstitch:
- Topstitch around the entire placemat, closing the opening as you go. This will also give a finished look and help the layers stay in place.
8. Optional Quilting:
- If you want to add quilting lines for extra detail and to secure the layers, you can stitch straight lines or a pattern across the placemat using your sewing machine.
9. Repeat:
- Repeat these steps for as many placemats as you’d like.
10. Enjoy:
- Your placemats are now ready to use! Enjoy setting a beautiful table with your handmade creations.
Feel free to customize this basic pattern by adding embellishments, using different fabrics, or experimenting with shapes and sizes. Happy sewing!