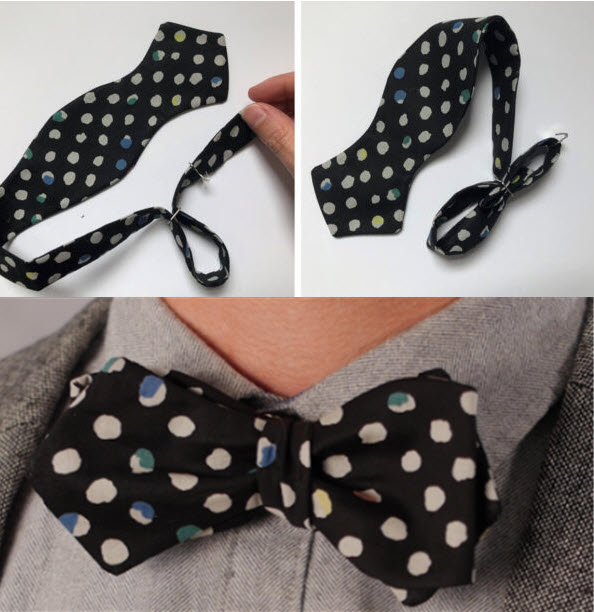
Creating a classic self-tied bowtie is a stylish sewing project. Here's a simple pattern and instructions for making a basic bowtie:
Materials:
- Bowtie fabric (approximately 1/2 yard)
- Interfacing (optional, for added structure)
- Thread in a matching color
- Bowtie hardware (bowtie slider, hook, and eye)
- Sewing machine
- Iron and ironing board
- Scissors
- Ruler
- Pins
- Hand sewing needle
Instructions:
- Prepare Your Fabric:
- Choose your fabric for the bowtie. Classic choices include silk, satin, or cotton. You can also use a fun pattern or texture to suit your style.
- Cut the Fabric:
- Cut two fabric pieces for your bowtie, each measuring approximately 12 inches long and 3 inches wide. You can adjust the width to your preference.
- Add Interfacing (Optional):
- Iron interfacing onto the back of one of the fabric pieces to give the bowtie some structure. If you're using a lightweight fabric, this step can help.
- Sew the Bowtie Pieces:
- Place the two fabric pieces right sides together (if using interfacing, have it facing outward). Sew around the edges, leaving a small opening (about 2 inches) along one of the long sides.
- Clip Corners:
- Trim the excess fabric from the corners without cutting too close to the stitching. This will help the corners appear crisp when you turn the bowtie right side out.
- Turn the Bowtie Right Side Out:
- Reach inside the small opening and carefully turn the bowtie right side out. Use a turning tool or a blunt object, like the back of a spoon, to help push out the corners.
- Press the Bowtie:
- Iron the bowtie flat, making sure the edges are neatly folded under at the opening.
- Topstitching:
- Topstitch around the edges of the bowtie, about 1/8 inch from the edge, to secure the opening and give the bowtie a finished look.
- Fold the Bowtie:
- Fold the bowtie in half lengthwise, with the right sides facing each other. Pin the open ends together.
- Stitch the Center Seam:
- Sew along the pinned edge to create a tube.
- Turn the Tube Right Side Out:
- Turn the tube right side out, and press it flat.
- Create the Center Pleats:
- Find the center of the tube and create two pleats on each side, folding the fabric toward the center. Pin the pleats in place.
- Secure the Center:
- Use a hand sewing needle and thread to secure the pleats in the center of the bowtie. Make a few stitches to hold them in place.
- Attach Hardware:
- Slide the bowtie slider onto one end of the bowtie, and sew it securely in place. On the other end, attach the hook and eye closure.
- Final Adjustments:
- Adjust the slider to the desired neck size and secure the bowtie by hooking the hook and eye together.
Your self-tied bowtie is ready to wear. This classic accessory is perfect for formal events or adding a touch of style to any outfit.


