Creating a flare pants sewing pattern involves drafting pattern pieces that provide a comfortable and stylish fit. Here's a step-by-step guide on how to create a basic flare pants pattern:
Materials Needed:
- Fabric (medium-weight woven or knit fabric)
- Sewing machine
- Thread
- Scissors
- Measuring tape
- Pins
- Pattern paper or large pieces of paper
- Pencil or pen
Steps:
- Take Measurements: Measure your waist, hips, inseam (inner leg length), and desired flare width. You'll also need to measure the length from your waist to where you want the pants to sit.
- Drafting the Pattern: Create a basic pattern using your measurements and the following steps:
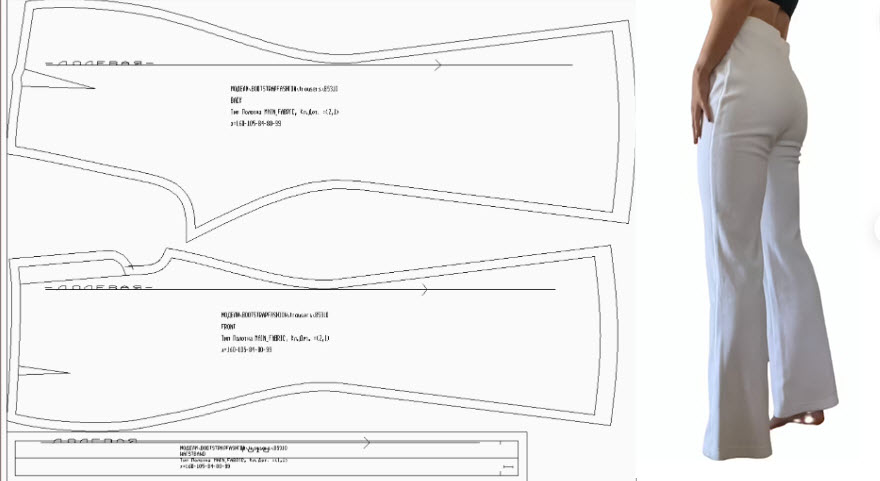
Front Piece:
- Draw a vertical line representing the center front (CF) of your pants pattern.
- From the top, mark down the distance from your waist to the desired pant position.
- Measure the waist measurement divided by 4 and mark it on the waist level.
- From the waist level, measure down to your hip measurement divided by 4 and mark it.
- Connect the waist and hip marks with a slightly curved line.
- Extend the line from the hip mark downwards for your desired flare width.
- From the hip mark, measure down the length of your inseam and mark it.
- Connect the flare point to the inseam mark with a straight line.
- Add seam allowances to the sides, waist, and inseam (usually 1/2 inch to 1 inch).
Back Piece:
- Use the same process as the front piece, adjusting the hip curve slightly for a more comfortable fit.
- Add seam allowances to the sides and inseam.
- Creating the Waistband:
- Measure the top opening of your front and back pattern pieces.
- Add a bit of extra width for seam allowance and overlap (usually about 1-2 inches).
- The waistband can be a separate rectangular piece or an extension of the back pattern piece.
- Cutting the Fabric:
- Pin the pattern pieces onto your fabric and cut them out. Be sure to cut two front pieces (mirrored) and two back pieces (mirrored).
- Sewing:
- Sew the front pieces together at the center front seam and the back pieces together at the center back seam, leaving the crotch area open.
- Inseam and Side Seams:
- Sew the inseams and side seams of the pants, aligning the edges of the fabric. Press the seams open or to one side.
- Waistband:
- If using a separate waistband piece, fold it in half lengthwise and sew the short ends together.
- Attach the waistband to the top of the pants, right sides together, matching the center back seam of the waistband with the center back seam of the pants.
- Fold the waistband over the seam allowances and stitch it down, leaving a small opening to insert elastic.
- Elastic Waist:
- Measure a piece of elastic that comfortably fits around your waist.
- Thread the elastic through the waistband casing using a safety pin.
- Overlap the elastic ends and stitch them securely together.
- Close the opening in the waistband.
- Hemming:
- Hem the bottom of the pants by folding the fabric twice and sewing in place.
- Try On and Adjust:
- Try on the pants to ensure a good fit. Make any necessary adjustments to the length or fit before finishing the seams and trimming excess fabric.
Remember that this is a basic guide, and you can customize the pattern by adding pockets, belt loops, or other design elements. It's recommended to practice your pattern with a muslin or scrap fabric first to perfect the fit before using your final fabric.


