
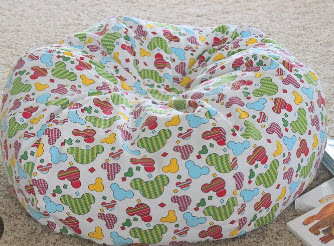
Creating a bean bag chair is a fun and versatile sewing project. Below is a simple bean bag chair sewing pattern to get you started. This pattern creates a medium-sized bean bag suitable for both kids and adults.
Materials you’ll need:
- 2.5 to 3 yards of durable fabric (such as cotton canvas, upholstery fabric, or outdoor fabric)
- 1.5 to 2 cubic feet of polystyrene bean bag filling (commonly known as “beans” or “beans for bean bags”)
- Thread
- Sewing machine
- Scissors
- Iron
- Pins
- Measuring tape
Instructions:
Step 1: Cut the fabric Cut two circles and one rectangle from your fabric:
- Circles: Each circle should have a diameter of approximately 28 to 30 inches.
- Rectangle: The rectangle should measure about 54 inches in width and 45 inches in length.
Step 2: Sew the circles With right sides facing each other, pin the two circles together. Sew around the edge using a 1/2 inch seam allowance, leaving a gap of about 8 inches for filling the bean bag.
Step 3: Sew the rectangle Fold the rectangle in half lengthwise, with right sides together. Pin and sew along the long edge, leaving about a 6-inch gap from each end for the top and bottom seams.
Step 4: Attach the rectangle to the circles Match the raw edges of the rectangle with the raw edge of one of the circles. Pin the rectangle to the circle, right sides facing each other. Sew them together using a 1/2 inch seam allowance. Repeat this step to attach the other end of the rectangle to the second circle.
Step 5: Create the top and bottom seams Turn the bean bag cover right side out. You will now have a cylinder shape. To create the top and bottom seams, measure about 16 inches from the edge of the circles towards the center of the cylinder. Mark this line all around the circumference of the cylinder. Sew along each marked line to create the top and bottom seams.
Step 6: Fill the bean bag With the bean bag cover still inside out, fill it with the polystyrene bean bag filling through the opening you left earlier. Fill it to your desired level of firmness. It’s essential not to overfill it, as you want the beans to move and conform comfortably to the user’s body.
Step 7: Close the bean bag Once you’re satisfied with the filling, carefully hand-sew the opening closed using a whip stitch or ladder stitch.
Step 8: Fluff and enjoy Now that your bean bag chair is complete, give it a good fluff to evenly distribute the filling. Your new bean bag chair is ready for use!
Remember, you can customize the size, fabric, and filling amount to create bean bag chairs of various sizes and comfort levels. Enjoy the comfort and relaxation of your handmade bean bag chair!