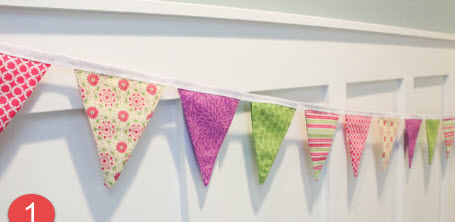
To create a simple banner, here's a sewing pattern using 13 fabric pieces. This pattern will result in a triangular-shaped banner with alternating fabric panels. Let's get started!
Materials you'll need:
- Fabric of your choice (in various colors or patterns)
- Sewing machine or needle and thread
- Scissors
- Pins
- Ribbon or bias tape for hanging
- Iron and ironing board (optional)
- Fabric marker or chalk (optional)
Instructions:
- Determine the size:
- Decide on the desired size of each fabric panel. For this pattern, we'll use a rectangular shape measuring approximately 8 inches (20 cm) wide and 10 inches (25 cm) long.
- Cut out the fabric pieces:
- Using the measurements from step 1, cut out 13 rectangular fabric pieces from your chosen fabrics. You can use different colors or patterns to create a variety.
- Arrange the fabric pieces:
- Lay out the fabric pieces in the desired order to create a pleasing color and pattern combination. You can mix and match the fabrics to your liking.
- Pin and sew the fabric pieces:
- Take two fabric pieces and place them with right sides together, aligning the shorter edges.
- Pin the edges together.
- Sew along the pinned edge using a ¼ inch (0.6 cm) seam allowance.
- Repeat this step to sew all the fabric pieces together, connecting them along their shorter edges. This will create a long strip of alternating fabric panels.
- Trim excess fabric and press seams (optional):
- Trim any excess fabric at the corners of the seams, being careful not to cut through the stitches.
- Optional: Press the seams open or to one side using an iron and ironing board. This step can give the banner a neater appearance.
- Create a triangular shape:
- Fold the fabric strip in half lengthwise with right sides together, matching up the longer edges.
- Align the shorter edges of the strip to create a triangular shape, ensuring that the seams are aligned as well.
- Pin the edges together, leaving a small opening at the top for turning and hanging.
- Sew the edges:
- Sew along the pinned edges using a ¼ inch (0.6 cm) seam allowance, starting from the bottom of the triangle and stopping before the opening at the top.
- Turn the banner right side out:
- Reach into the small opening and carefully pull the fabric through, turning the banner right side out.
- Gently push out the corners of the triangular shape to ensure it is well-defined.
- Press the banner (optional):
- Optional: Press the banner with an iron on a low setting to remove any wrinkles and give it a crisp look.
- Attach the hanging ribbon or bias tape:
- Cut a length of ribbon or bias tape according to the desired length for hanging the banner.
- Insert the ribbon or bias tape through the opening at the top of the banner and position it evenly.
- Fold the top edges of the banner inward and pin them in place, sandwiching the ribbon or bias tape.
- Sew across the folded edges to secure the ribbon or bias tape and close the opening.
- Finishing touches:
- Trim any loose threads and make sure the ribbon or bias tape is securely attached.
And there you have it—a simple banner using 13 fabric pieces. Feel free to personalize your banner by adding embellishments, letters, or other decorative elements. You can also adjust the number of fabric pieces or their dimensions to create a different size or shape. Enjoy creating your handmade banner!


