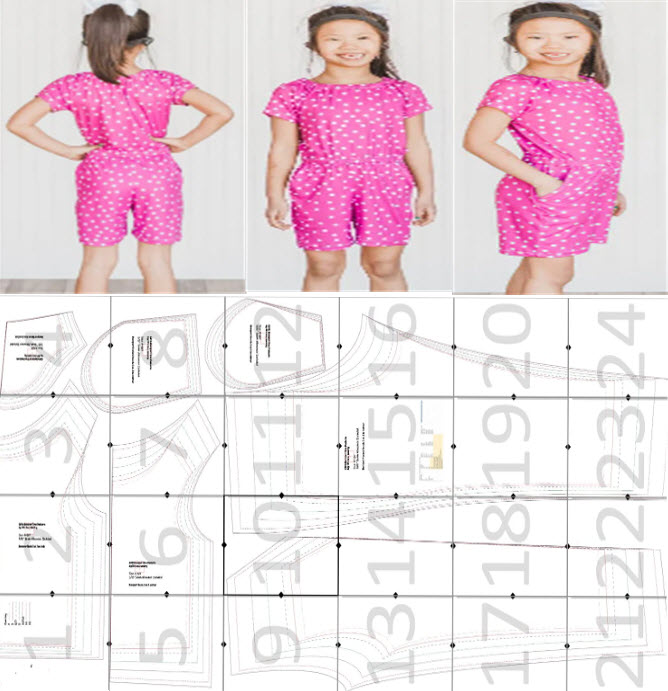
Creating a sewing pattern for a romper involves several steps, and it's important to have basic sewing skills. Here, I'll guide you through the process of making a simple romper sewing pattern. Please note that measurements and design can vary based on personal preferences, so feel free to adjust as needed.
Materials:
- Large paper or pattern paper
- Pencil
- Ruler
- Measuring tape
- Scissors
Instructions:
- Take Measurements:
- Measure the following:
- Bust: Around the fullest part of the bust.
- Waist: Around the natural waistline.
- Hip: Around the fullest part of the hips.
- Torso Length: From the shoulder to the natural waistline.
- Inseam: From the crotch to the desired length of the shorts.
- Measure the following:
- Create the Bodice Pattern:
- Draw a rectangle on the paper with a width equal to half the bust measurement plus seam allowances and a height equal to the torso length plus seam allowances.
- Divide the rectangle into two equal parts vertically. These will be the front and back bodice pieces.
- Add a curve for the neckline on the front piece. You can make it as deep or as shallow as you like.
- Add 1-2 inches for seam allowances around all edges.
- Create the Shorts Pattern:
- For the shorts, draw a rectangle with a width equal to half the hip measurement plus seam allowances and a height equal to the inseam measurement plus seam allowances.
- Add a slight curve on the top of the rectangle for the waistline.
- Add 1-2 inches for seam allowances around all edges.
- Create the Sleeve Pattern:
- If you want sleeves, draw a rectangle with a width equal to the desired sleeve length plus seam allowances and a height equal to the desired width of the sleeve plus seam allowances.
- Curve the top of the rectangle for the shoulder. Add 1-2 inches for seam allowances around all edges.
- Assemble and Cut:
- Cut out the pattern pieces along the outer lines.
- Transfer any markings, such as darts or pleats, from the pattern to the fabric.
- Pin the pattern pieces to your fabric and cut out the fabric pieces.
- Sewing:
- Follow the instructions on the pattern for sewing the romper together.
- Typically, you will sew the bodice pieces together, attach the shorts, and add sleeves if desired.
- Install a zipper or buttons for closure.
- Finishing Touches:
- Hem the shorts and sleeves to the desired length.
- Finish raw edges with a serger or zigzag stitch to prevent fraying.
Remember to adjust the pattern based on your preferences and measurements. This is a basic guide, and you can customize it to create the romper style you want.


