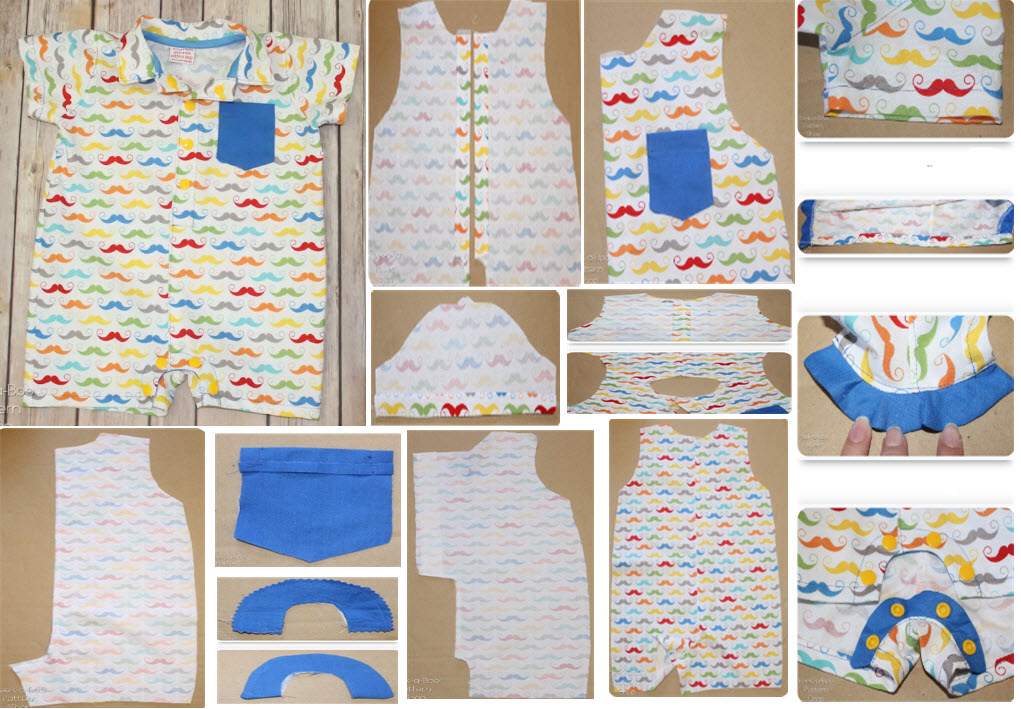
Creating a baby romper sewing pattern is a fun project that allows you to customize clothing for your little one. Below is a basic guide to help you create a simple baby romper sewing pattern:
Materials You'll Need:
- Fabric (cotton is a good choice for baby clothing)
- Sewing machine
- Thread
- Scissors
- Measuring tape
- Pattern paper or tissue paper
- Pencil or fabric marker
- Snaps or buttons for closures
Steps to Create the Baby Romper Sewing Pattern:
- Measure the Baby: Measure the baby's chest, waist, hip, inseam, and length from the shoulder to the crotch. These measurements will be essential for creating the pattern that fits properly.
- Draft the Pattern: Start with a basic one-piece pattern. Here's a simple method to create a romper pattern:
- Draw a vertical line on your pattern paper, representing the center front.
- From the top, measure the shoulder-to-crotch length and mark it as point A.
- Mark the half of the chest, waist, and hip measurements as points B, C, and D respectively along the center front line.
- Create a curved line connecting these points, creating a U-shaped neckline and curved leg openings. Adjust the depth of the U-shape to your preference.
- Extend the shoulder line slightly for seam allowance.
- Add seam allowances (typically 1/4 inch to 1/2 inch) to all edges of your pattern.
- Cut and Assemble the Fabric:
- Lay your fabric out flat and pin the pattern to it.
- Cut the fabric pieces following your pattern, making sure to cut two mirror-image pieces for the front and back.
- Cut two long strips for the straps (adjust the length based on your baby's size).
- Cut additional pieces for any pocket or embellishment you want to add.
- Sewing the Romper:
- Place the front and back pieces right sides together and sew along the shoulder and side seams.
- Hem the leg openings and neckline. You can fold the edges twice and stitch to create a clean finish.
- Attach snaps or buttons at the crotch for easy diaper changes.
- Sew the straps, fold them in half lengthwise, and then turn them right side out. Attach them to the front and back of the romper.
- Add any pockets or embellishments you want to customize the romper.
- Finish and Try On:
- Trim any loose threads and give the romper a final press to make it look neat.
- Try the romper on the baby to ensure it fits correctly. Make any necessary adjustments for the next one.
Remember to use baby-safe and breathable fabrics for the romper, and always prioritize safety when adding closures or embellishments.
This is a basic pattern to get you started. As you gain more experience, you can experiment with different styles and variations to create unique and adorable baby rompers.


