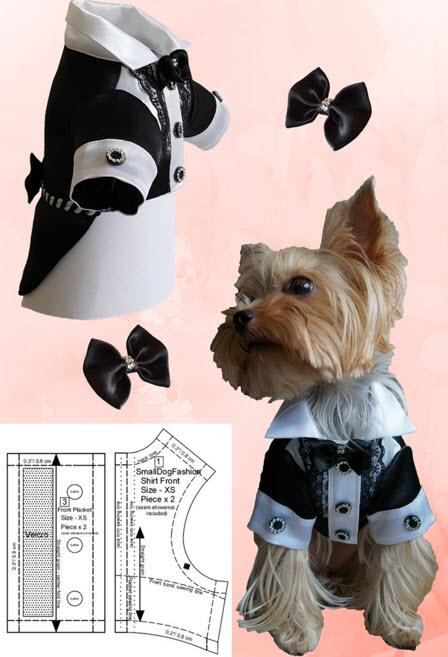
Creating pet clothes can be a fun and creative sewing project. There are many patterns available for various pet sizes and styles. Here's a list of 25+ pet clothes sewing patterns you can explore for your furry friends: a dog tuxedo
Below, I'll provide a basic outline for making a dog tuxedo pattern. Keep in mind that you may need to adjust the measurements and details to fit your specific dog's size and style preferences.
Materials and Tools Needed:
- Measuring tape
- Pencil and paper for creating the pattern
- Fabric for the tuxedo (black or other formal fabric)
- Lining fabric (for the inside)
- Sewing machine and thread
- Buttons or snaps for closures
- Interfacing (optional, for added structure)
- Scissors, pins, and other sewing supplies
Steps to Create a Dog Tuxedo Pattern:
- Measure Your Dog:
- Measure your dog's neck circumference, chest circumference, back length, and waist (around the narrowest part of the abdomen). You'll use these measurements to create a custom pattern.
- Create the Pattern for the Tuxedo Jacket:
- Start by creating the pattern for the main part of the tuxedo, which is the jacket.
- Draw a rectangle on your pattern paper for the back panel of the jacket. The width should be approximately half of your dog's chest measurement, and the length should be the desired length of the jacket from the base of the neck to the desired end point (usually the base of the tail).
- Draw a curve at the top of the rectangle to create the neckline.
- Add a center front line for the jacket opening, which extends downward from the neckline.
- Create a smaller rectangle for each of the two front panels. These should be about half the width of your dog's chest measurement and the same length as the back panel.
- Add seam allowances (usually 1/2 inch to 5/8 inch) to all edges of the pattern pieces.
- Cut the pattern pieces out.
- Create the Pattern for the Collar:
- Draw a rectangle for the collar. The width should be based on your dog's neck circumference plus some ease for comfort, and the length should be your desired collar height.
- Add seam allowances to the collar pattern.
- Create the Pattern for the Bowtie:
- Draw a rectangle for the bowtie. The size of the rectangle will depend on how big you want the bowtie to be.
- Cut the rectangle in half lengthwise to create two bowtie pieces.
- Create a smaller rectangle for the center knot of the bowtie.
- Add seam allowances to all bowtie pattern pieces.
- Assemble and Cut the Fabric:
- Pin your pattern pieces to the fabric and lining, and cut them out.
- Optionally, add interfacing to the jacket pieces for added structure.
- Sew the Tuxedo:
- Sew the front panels to the back panel at the shoulder seams and side seams, right sides together.
- Attach the collar to the neckline.
- Hem the bottom edge of the jacket.
- Sew the bowtie pieces right sides together, leaving an opening for turning. Turn it right side out, press, and hand-sew the opening closed.
- Attach the bowtie to the collar.
- Closures:
- Add buttons, snaps, or hook-and-loop fasteners to the front of the jacket for closure.
- Final Adjustments:
- Try the tuxedo on your dog to ensure a good fit, and make any necessary adjustments.
With these steps, you should have a basic pattern for a dog tuxedo that you can customize to fit your dog's size and style. Don't forget to take your time, and have fun with fabric choices and embellishments to make the tuxedo special for your furry friend.


