Certainly! Here's a simplified sewing pattern for a basic t-shirt:
Materials:
- Knit fabric (jersey, interlock, or other stretchy knit fabric)
- Coordinating thread
- Sewing machine
- Scissors
- Pins
- Optional: Rib knit fabric for the neckline and cuffs
- Optional: Sewing machine needle for knits (ballpoint or stretch needle)
Instructions:
- Prepare the Pattern:
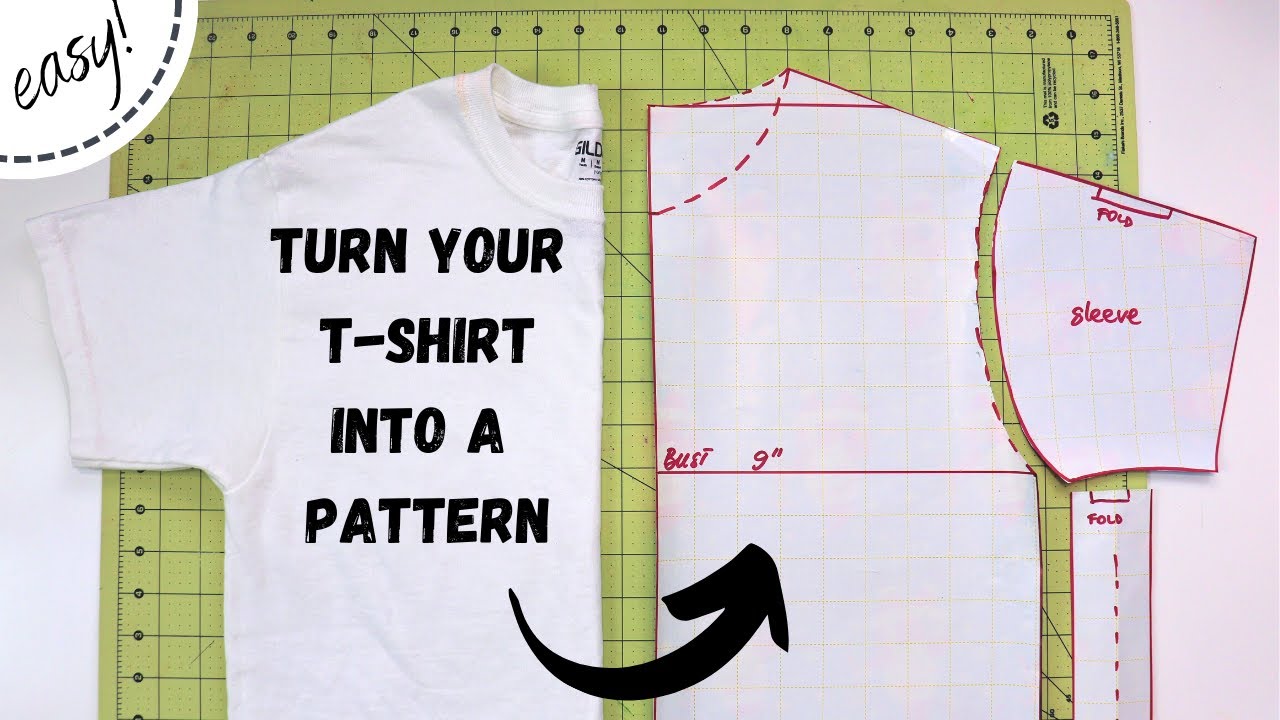
- Start by creating a pattern for the t-shirt. You can use an existing well-fitting t-shirt as a template or draft your own pattern. To draft your own, you'll need to measure your bust/chest, waist, and hip circumference, as well as the desired length of the t-shirt.
- Draw a rectangle on pattern paper or another large sheet of paper, with the width equal to half of your bust/chest measurement plus ease (add around 2-4 inches for a comfortable fit) and the height equal to your desired length plus seam allowance (typically 1/2 inch or 1.3 cm).
- From the top corners of the rectangle, measure down the shoulder length (typically 3-4 inches) and mark the points. Connect these points with a slightly curved line to create the shoulder seam.
- From the bottom corners of the rectangle, measure in the armhole length (typically 6-7 inches) and mark the points. Connect these points with a slightly curved line to create the side seam.
- Cut out the pattern piece, and fold it in half along the shoulder seam line to ensure it's symmetrical.
- Cut the Fabric:
- Pin the pattern piece to the knit fabric and cut out two mirror-image pieces for the front and back of the t-shirt. If you're using rib knit fabric for the neckline and cuffs, measure and cut those pieces as well.
- Sewing the T-Shirt:
- With right sides together, align the shoulder seams of the front and back pieces and pin them in place.
- Using a sewing machine, sew the shoulder seams with a stretch stitch or a narrow zigzag stitch. Alternatively, you can use a serger if available.
- If you're using rib knit fabric for the neckline and cuffs, fold each piece in half lengthwise with wrong sides together and press lightly.
- Align the raw edges of the rib knit fabric with the corresponding openings (neckline, sleeve cuffs, and bottom hem) and pin them in place. If you're not using rib knit fabric, you can skip this step.
- Sew the rib knit fabric to the t-shirt using a stretch stitch or a narrow zigzag stitch, stretching the rib knit slightly as you sew to match the length of the openings.
- With right sides together, align the sleeves with the armholes and pin them in place.
- Sew the sleeves to the t-shirt, following the armhole curve, with a stretch stitch or a narrow zigzag stitch.
- Finally, sew the side seams of the t-shirt, starting from the sleeve hem and going down to the bottom hem. Sew with a stretch stitch or a narrow zigzag stitch.
- Finishing Touches:
- Trim any loose threads and give the t-shirt a press with an iron to smooth out the seams.
- Try on the t-shirt and make any necessary adjustments to the fit.
This basic t-shirt pattern can serve as a starting point, and you can customize it further by adding different necklines, sleeve lengths, or other design elements to suit your preferences. Enjoy sewing your t-shirt!


