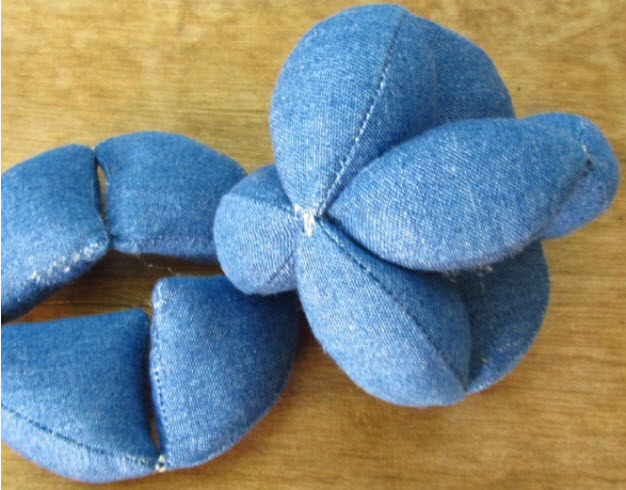
Creating an Amish puzzle ball requires a more intricate sewing pattern. The Amish puzzle ball is a soft toy made of multiple fabric segments that can be assembled into a ball shape. Here's a step-by-step guide to sewing an Amish puzzle ball:
Materials needed:
- Cotton or fabric of your choice (in various colors)
- Sewing machine
- Thread
- Scissors
- Pins
- Polyester fiberfill or stuffing material
Instructions:
- Create a pattern for the fabric segments of the puzzle ball. You'll need six identical fabric segments shaped like an equilateral triangle. The dimensions of each triangle segment can vary, but a common size is approximately 4-5 inches (10-13 cm) on each side.
- Use the pattern to cut out six fabric segments from your chosen fabrics. You can mix and match colors and patterns to create an attractive puzzle ball.
- Take two fabric segments and align them with right sides facing each other. Pin them together along one of the sides of the triangle.
- Sew along the pinned edge using a ¼ inch (0.6 cm) seam allowance, leaving the other two sides of the triangle open. Backstitch at the beginning and end of the seam to secure it.
- Repeat steps 3 and 4 to sew the remaining fabric segments together, creating a total of three pairs of connected segments.
- Take two pairs of connected segments and align them with right sides facing each other. Pin them together along one side of the triangle.
- Sew along the pinned edge, again leaving the other two sides open. Repeat this step with the remaining pair of connected segments.
- You should now have two halves of the puzzle ball. Place them together with right sides facing each other, aligning the open sides of the triangles.
- Pin the halves together, making sure to match the corners and edges accurately.
- Start sewing at one corner, using a ¼ inch (0.6 cm) seam allowance. Sew along the open sides of the triangles, leaving a small opening of about 2-3 inches (5-7.5 cm) for turning the ball right side out.
- Trim the excess fabric at the corners to reduce bulk.
- Turn the puzzle ball right side out through the opening, gently pushing out the corners and edges with a blunt tool or your fingers. Make sure all the edges are crisp and smooth.
- Fill the ball with polyester fiberfill or stuffing material, ensuring that it is evenly distributed throughout the segments.
- Hand sew the opening closed using a slip stitch or ladder stitch.
Congratulations! You've completed an Amish puzzle ball. The segments can be rearranged to create different patterns and configurations, offering hours of fun and exploration.


